Instalar as vmware tools via rpm

O vmware é um dos sistemas de virtualização mais utilizados a nível profissional.

Ao instalar um vm CentOS 6.x no vmware é necessário instalar um conjunto de drivers para que o SO funcione de forma integrada com o hipervisor. Essas ferramentas chamam-se vmware-tools.
Para instalar as vmware-tools via rpm é necessário realizar os seguintes passos:

Instalar/criar o repositório da vmware:
[cc lang=”bash” width=”100%”]
echo ‘[vmware-tools]’ > /etc/yum.repos.d/vmware.repo
echo ‘name=VMware Tools’ >> /etc/yum.repos.d/vmware.repo
echo ‘baseurl=http://packages.vmware.com/tools/esx/5.5latest/rhel6/$basearch’ >> /etc/yum.repos.d/vmware.repo
echo ‘enabled=1’ >> /etc/yum.repos.d/vmware.repo
echo ‘gpgcheck=1’ >> /etc/yum.repos.d/vmware.repo
[/cc]

Instalar a chave da vmware:
[cc lang=”bash” width=”100%”]
rpm –import ‘http://packages.vmware.com/tools/keys/VMWARE-PACKAGING-GPG-RSA-KEY.pub’
[/cc]

Executar o comando para instalar as vmware-tools:
[cc lang=”bash” width=”100%”]
yum -y install vmware-tools-esx-nox
[/cc]
ou, caso tenha o modo gráfico instalado:
[cc lang=”bash” width=”100%”]
yum -y install vmware-tools-esx
[/cc]

Send email from Linux command line

Every once a while you need to send email from a Linux command line and there you go to google try to find it…

With attachment:

echo "message" | mailx -s "subject" -a attachment email@dress
echo "message" | mutt -s "subject" -a attachment -- email@dress

Without attachment:

echo "message" | mail -s "subject" email@ddress

Important:
Postfix by default restrict attachment size to approx 10MB i.e. 10240000 bytes.

You can check it using following command:

postconf | grep message_size_limit

To change attachment-size to say 50 MB, run a command like:

postconf -e message_size_limit=52428800

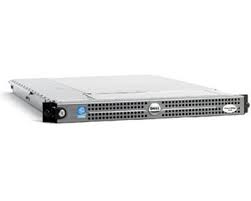
Dell PowerEdge 1750 kernel panic on CentOS 6.x workaround

If you have an old Dell PowerEdge 1750 and want to install CentOS 6.x on it so that you can do something useful with it you will bump into kernel panic once you install it. So after some googling I’ve found this workaround to solve the kernel panic problem.
[cc lang=”bash” width=”100%”]
dmesg
[/cc]
If somewhere on that list of line you find the folowing:
[cc width=”100%”]
scb2_flash: warning – can’t reserve rom window, continuing
resource map sanity check conflict: 0xfff00000 0xffffffff 0xfff80000 0xffffffff reserved
————[ cut here ]————
WARNING: at arch/x86/mm/ioremap.c:98 __ioremap_caller+0x435/0x450() (Not tainted)
Hardware name: PowerEdge 1750
Info: mapping multiple BARs. Your kernel is fine.
Modules linked in: scb2_flash(+) ext4 jbd2 mbcache sd_mod crc_t10dif sr_mod cdrom megaraid_mbox megaraid_mm ata_generic pata_acpi pata_serverworks dm_mirror dm_region_hash dm_log dm_mod [last unloaded: scsi_wait_scan]
Pid: 452, comm: modprobe Not tainted 2.6.32-431.5.1.el6.i686 #1
Call Trace:
[] ? warn_slowpath_common+0x81/0xc0
[] ? __ioremap_caller+0x435/0x450
[] ? __ioremap_caller+0x435/0x450
[] ? warn_slowpath_fmt+0x33/0x40
[] ? __ioremap_caller+0x435/0x450
[] ? scb2_flash_probe+0x99/0x2a0 [scb2_flash]
[] ? ioremap_nocache+0x18/0x20
[] ? scb2_flash_probe+0x99/0x2a0 [scb2_flash]
[] ? scb2_flash_probe+0x99/0x2a0 [scb2_flash]
[] ? local_pci_probe+0xb/0x10
[] ? pci_device_probe+0x61/0x80
[] ? driver_probe_device+0x87/0x290
[] ? pci_match_device+0x12/0xa0
[] ? __driver_attach+0x79/0x80
[] ? __driver_attach+0x0/0x80
[] ? bus_for_each_dev+0x52/0x80
[] ? driver_attach+0x16/0x20
[] ? __driver_attach+0x0/0x80
[] ? bus_add_driver+0x1b7/0x2b0
[] ? pci_device_remove+0x0/0x40
[] ? driver_register+0x5f/0x110
[] ? tracepoint_module_notify+0x1f/0x30
[] ? scb2_flash_init+0x0/0x14 [scb2_flash]
[] ? __pci_register_driver+0x3d/0xb0
[] ? do_one_initcall+0x2f/0x1c0
[] ? sys_init_module+0xb4/0x220
[] ? do_page_fault+0x2a/0x90
[] ? syscall_call+0x7/0xb
—[ end trace 9fd84e2ca1f666fb ]—
[/cc]
Edit /etc/modprobe.d/blacklist.conf file
[cc lang=”bash” width=”100%”]
vim /etc/modprobe.d/blacklist.conf
[/cc]
and add:
[cc lang=”bash” width=”100%”]
# Cheesy workaround to clean up Dell PowerEdge 1750 boot
# scb2_flash is not happy and causes a kernel oops and traceback
# Not sure of the consequences of not having this and its associated modules loaded, but the machine boots cleanly
# http://www.mailrepository.com/ubuntu-bugs.lists.ubuntu.com/msg/3409389/
blacklist scb2_flash
[/cc]

Install Java SE Development Kit 7u40 on CentOS 6.4

Installing JDK on CentOS can be hard, so to help you I’ve made this simple tutorial. Hope it helps…

Download and install:

Go to http://www.oracle.com/technetwork/java/javase/downloads/index.html an select JDK Download.

Install JDK:
[cc lang=”bash” width=”100%”]
rpm -ivh /path-to-file/jdk-7u40-linux-i586.rpm
[/cc]
And set it up:
[cc lang=”bash” width=”100%”]
alternatives –install /usr/bin/java java /usr/java/latest/jre/bin/java 20000
alternatives –install /usr/bin/javaws javaws /usr/java/latest/jre/bin/javaws 20000
[/cc]

Check if it is installed correctly:

[cc lang=”bash” width=”100%”]
java -version
[/cc]
Should return something like:
[cc lang=”bash” width=”100%”]
java version “1.7.0_40″
Java(TM) SE Runtime Environment (build 1.7.0_40-b43)
Java HotSpot(TM) Server VM (build 24.0-b56, mixed mode)
[/cc]
And
[cc lang=”bash” width=”100%”]
javac -version
[/cc]
Should return something like:
[cc lang=”bash” width=”100%”]
javac 1.7.0_40
[/cc]

OPTIONAL

Set JAVA_HOME variable:

[cc lang=”bash” width=”100%”]
echo “export JAVA_HOME=\”/usr/java/latest\”” > /etc/profile.d/java.sh
[/cc]

Install Firefox browser support:

32-bit plugin:
[cc lang=”bash” width=”100%”]
alternatives –install /usr/lib/mozilla/plugins/libjavaplugin.so libjavaplugin.so /usr/java/latest/jre/lib/i386/libnpjp2.so 20000
[/cc]
64-bit plugin:
[cc lang=”bash” width=”100%”]
alternatives –install /usr/lib64/mozilla/plugins/libjavaplugin.so libjavaplugin.so.x86_64 /usr/java/latest/jre/lib/amd64/libnpjp2.so 20000
[/cc]

References:

  1. Install Oracle Java JDK/JRE 7u25 on Fedora 19/18, CentOS/RHEL 6.4/5.9

Nokia E55 MEO VoIP

Abaixo seguem as configurações do cliente Voice over IP testadas num telefone Nokia E55 com serviço VoIP do SAPO/MEO:

Especificações do equipamento:
Equipamento: Nokia E55
Versão de software: 034.001
Data da versão de software: 02 de Abril de 2010
Versão customizada: 034.001.000.01
Data da versão customizada: 02 de Abril de 2010
Language set: 25.01
Modelo: E55-1
Tipo: RM-482

Antes de efectuar qualquer configuração deve instalar a aplicação de configuração VoIP da Nokia disponivel em aqui (SIP_VoIP_3_x_Settings_v2_0_en.sis). Atenção que será necessário fazer registo no site.

Em Menu->Control Panel->Net Settings->Advanced VoIP settings
Seleccionar SIP settings->New SIP profile

Nome do perfil: qualquer coisa por ex: Meo
Perfil do serviço: IETF
Pt.de acesso predef: Internet ou outro como por ex: Intranet
Nome utilizador público: [email protected] (número criado na área de clientes sapo)
Utilizar compressão: Não
Registo: Quando necessário
Utilizar segurança: Não

Endereço servidor proxy: proxy.voip.sapo.pt
Domínio Realm: proxy.voip.sapo.pt
Nome de utilizador: +35130xxxxxxxx (número criado na área de clientes sapo)
Senha: password definida na área clientes sapo
Permitir encam. livre: Sim
Tipo de transporte: UDP
Porta: 5070

Ender. servidor registar: voip.sapo.pt
Domínio realm: voip.sapo.pt
Nome do utilizador: +35130xxxxxxxx (número criado na área de clientes sapo)
Senha: (password definida na área de clientes sapo)
Tipo de transporte: UDP
Porta: 5060

Windows 7 SP1 Cleanup

Has you know, Windows 7 SP1 is out there for a long time. Maybe what you don’t know is that after installation there’s a lot of junk files that can be deleted with the following command:

[cc lang=”dos” width=”100%”]
DISM.exe /online /Cleanup-Image /spsuperseded
[/cc]

SSL Certification Authority on Linux

SSL Certification authority

In cryptography, a certificate authority, or certification authority, (CA) is an entity that issues digital certificates. The digital certificate certifies the ownership of a public key by the named subject of the certificate. This allows others (relying parties) to rely upon signatures or assertions made by the private key that corresponds to the public key that is certified. In this model of trust relationships, a CA is a trusted third party that is trusted by both the subject (owner) of the certificate and the party relying upon the certificate. CAs are characteristic of many public key infrastructure (PKI) schemes.1

Prerequisites

OpenSSL must be installed in order to create/manage certificates.

In the folder list I’m using ssl-name where name represents the entity that owns the CA.

Create folder structure

mkdir /etc/ssl-name
mkdir /etc/ssl-name/private
mkdir /etc/ssl-name/certs
mkdir /etc/ssl-name/crl
mkdir /etc/ssl-name/newcerts

Change default values in openssl.cnf

mkdir /etc/ssl-name
cp /etc/pki/tls/openssl.cnf /etc/ssl-name
vi /etc/ssl-name/openssl.cnf

In the following zones change the values:

mkdir /etc/ssl-name
[ CA_default ]

dir = /etc/ssl-name
certificate = $dir/certs/ca.crt
private_key = $dir/private/ca.key

[ req_distinguished_name ]

countryName_default = YOUR COUNTRY 2CHARS
stateOrProvinceName_default = YOUR PROVINCE NAME
localityName_default = YOUR LOCALITY NAME
0.organizationName_default = YOUR ORGANIZATION NAME
organizationalUnitName_default = YOUR ORGANIZATIONAL UNIT NAME
challengePassword_default = CHALLENGE PASSWORD
unstructuredName_default = SIMPLE NAMEFOR YOUR ORG

Initialize files with default values:

mkdir /etc/ssl-name
touch /etc/ssl-name/index.txt
echo '01' > /etc/ssl-name/serial
touch /etc/ssl-name/crlnumber
echo '00' > /etc/ssl-name/crlnumber

CA certificate

Generate CA certificate:

openssl req -config /etc/ssl-name/openssl.cnf -new -x509 -extensions v3_ca -keyout /etc/ssl-name/private/ca.key -out /etc/ssl-name/certs/ca.crt

Server Certificate

Generate a Certificate Request:

openssl req -config /etc/ssl-name/openssl.cnf -new -nodes -newkey rsa:2048 -keyout /etc/ssl-name/private/server.key -out /etc/ssl-name/server.csr -days 365

Be sure to type your service name correctly under the Common Name (CN) field (eg. www.yourservice.com)

Sign the Certificate Request

You can sign the server certificate request by issuing the following command:

openssl ca -config /etc/ssl-name/openssl.cnf -out /etc/ssl-name/certs/server.crt -infiles /etc/ssl-name/server.csr

or

openssl ca -config /etc/ssl-name/openssl.cnf -policy policy_anything -out /etc/ssl-name/certs/server.crt -infiles /etc/ssl-name/server.csr

”-policy policy_anything” it means that the fields about the Country, State or City is not required to match those of your CA’s certificate (see /etc/ssl-name/openssl.cnf).

Two files were created:

  1. /etc/ssl-name/certs/server.crt – Server certificate.
  2. /etc/ssl-name/newcerts/01.pem – Same certificate, but with the certificate serial number as a filename.

You can now delete your certificate request file

rm -rf /etc/ssl-name/server.csr

Verify Server Certificate file

To check certificate basic info issue the following command:

openssl x509 -subject -issuer -enddate -noout -in /etc/ssl-name/certs/server.crt

To check certificate “useful” info issue the following command:

openssl x509 -in /etc/ssl-name/certs/server.crt -noout -text

To check certificate is still valid to use on a sslserver, issue the following command:

openssl verify -purpose sslserver -CAfile /etc/ssl-name/certs/ca.crt /etc/ssl-name/certs/server.crt

Revoke Server Certificate

To revoke the server certificate, issue the following command:

openssl ca -config /etc/ssl-name/openssl.cnf -revoke /etc/ssl-name/certs/server.crt

After each revocation you must generate a new CRL (Certificate Revokation List):

openssl ca -config /etc/ssl-name/openssl.cnf -gencrl -out /etc/ssl-name/crl/ca.crl

Be sure distribute the CRL file to those who trust your CA (eg. publish it online)

Server Certificate file misc.

To put the server certificate and key on the same file, issue the following command:

cat /etc/ssl-name/certs/server.crt /etc/ssl-name/private/server.key > /etc/ssl-name/private/server.pem

To convert the server certificate to DER format, issue the following command:

openssl x509 -in /etc/ssl-name/certs/server.crt -inform PEM -out /etc/ssl-name/certs/server.der -outform DER

More

Can I create my own S/MIME certificate for email encryption?
Email Certificates
Issue Your Own Self-Signed S/MIME Certs with OpenSSL
How do I create a valid email certificate for Outlook S/MIME with openssl?
How To Encrypt Mails With SSL Certificates (S/MIME)
Howto: Make Your Own Cert With OpenSSL